I did an image transfer last night and since it's been awhile, it took me a minute to think about how to do it. I thought maybe some of you haven't done it in awhile either and could use a refresher.
1. Take a photocopy or laser printer image (ink jet probably works too, but haven't used it with this method) with your image in
reverse. I'm using a drawing by Leonardo
DaBomb DaVinci.
2. Lay your image face down on the paper you want it transferred to that has been prepared with a nice and juicy layer of gel medium. I use
Golden Soft Gel --my gel is semi-gloss, but it really doesn't matter what you use for transferring--on a thick piece of printmaking paper. Rives BFK is wonderful since it holds up nicely in water, which will be covered in step #4. My Rives has been slightly tinted with Golden Fluid Acrylics and then dried before applying the gel medium, that's why it's a bit orange.
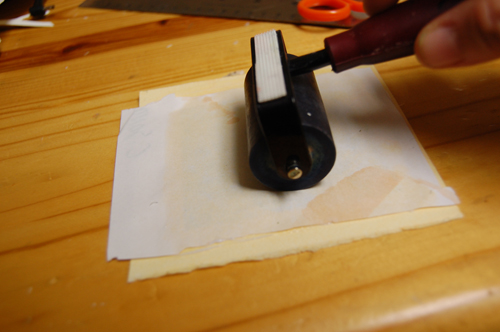
3. Use a brayer, or spoon, or heavy books and glue that sucker down really, really well. At this stage I glue then leave it stacked under a pile of books so it won't ripple while drying. Let dry completely.
4. When your paper is dry--it will be hard to wait, I know, but don't jump the gun on this--wet down the top of your laser printer paper and gently rub until your image appears.Basically you're wearing away the laser printer paper.
5. Now it's time to blot and then stack under more heavy books to prevent ripples.
6. After your transferred image is dry, you may notice some of the laser printer paper that never quite got worn away. Give it another go with the water and rubbing. Dry as before. In my finished work, which was the first pic, I topped the finished piece with a thin coat of the gel medium. This isn't a necessary step, but doing so absorbed any residual paper fibers that can leave a white haze.
 |
| Cathy Savage, Electric Charges, 2010 |
Here's another piece where I used the same method. It worked directly on wood, so the applications are pretty wide open.
Have fun!


No comments:
Post a Comment