 |
| © 2010 Cathy Savage, Tesla and His Favorite Things, 20 x 20", encaustic collage |
Showing posts with label encaustic. Show all posts
Showing posts with label encaustic. Show all posts
Tuesday, March 13, 2012
Time to Let Go
Thursday, July 7, 2011
Bring out your Dead!
 Ok, not literally. But I kept having that ditty play over and over (it's from Monty Python and the Holy Grail if you weren't aware) as I was working on this piece from exactly one year ago.
First order, dust it off. Then I cut quarter rounds with the chop saw for support (info here on how and why that's done). I was about to print patent drawings from PBS's website from their segment on Tesla--they have a great documentary called Master of Lightning, and that's not the crazy part of me talking, but the rational part. Worth seeing for sure!--and burnish them into my wax like this piece here,

but I kind of liked the less active approach, with Tesla locking eyes with me instead of my eyes bouncing around to random drawings. I was locked in. Ok, that may be the crazy part of me talking. But I've decided I like the piece--the front anyway--exactly the way it was one year ago.
Done! I'm going to skip the outer frame because I like it without the border. The wax will be more susceptible to dings but I am liking it even with the risk. I'll be sure to include a bit on encaustic care on the back should it sell, and will make a note on the care required for the edges.
Saturday, March 5, 2011
Jumping through Hoops
 Well, my assemblage is *just* about finished. I'm elated, but it's hard to tell because I'm so exhausted. (I'm also too lazy to get out my tripod so the pics are just so-so.) I'm waiting on two more little items before it's completely done:
1. the plexiglas that is going to slide into the front of the box which I'll order on Monday
I've taken a few other pictures during the making, which you'll find below. BTW, the box's dimensions are 14x11".


This has been a crazy week. My afternoon tea turned into evening tea every single night. I did have fun screenprinting shirts on Thursday and learned something about the ink. I'll do a post next week all about it. I'm printing shirts for 3 more 1st grade classes next week (get this, I don't have a 1st grader! I'm crazy to do this stuff...) so I'll have lots of experience very soon. Have a great weekend!
PS You'll be able to pull this guy's string at WPA's opening on Saturday eventing the 12th at Pump Project. Join me!
Tuesday, March 1, 2011
New tool added to my repertoire

 Tasks to date. Gessoed the bottom of the wooden box where this performing Perriot is going to be bouncing around. Drew background with pencil and covered with a layer of wax. (The blue tape is hopefully going to keep any stray wax from getting on the sides of the box.)
Sand wooden body parts, which I'll hopefully do today. After sanding I'll apply a coat of gesso and then paint them with acrylic paint. I'm not quite as far as I had hoped at this point, but I am still on target for a Saturday drop off. I have a feeling I'll be burning some midnight oil--this is a busy week.
Sunday, February 20, 2011
Project this week--Performing Perriot
I made this pull toy last year for my show in San Antonio at StoneMetal Press, and I'm going to make another variation.

I have a wooden box and extra proofs of this

and I plan on cutting the wood with my Dremel tool tomorrow. I have known about WPA's upcoming show, aptly named Under Pressure, for the last several weeks but haven't managed to get anything finished, so I figured this would be a good project. I've been meaning to do it anyway and now I'm forced to spring into action (deadline for drop off is March 6). One thing I like about this piece is it's viewer participation. I need to make sure I make a sign that says "please pull string." You'll be seeing my progress this week.
(No knitting on my weekend off, but lots of hugs, laughs, and mimosas with family and friends. It was wonderful to get away. Consider me renewed and up to task for this week's must-do project!)
Sunday, January 16, 2011
Week 2

This piece is itty bitty. I haven't worked this small in awhile, but it was a fun study nonetheless. The next one, already in the works, is on catchers and their signals.

Friday, December 17, 2010
Encaustic piece finished!

She wrote:
"We're not artists or printmakers, so we might be misunderstanding the term 'print'. What we're looking for is a piece that you made with your tools and hands, and not a photo of the piece printed on paper."
So fellow printmakers, there is hope out there that individuals do not want reproductions. I've been tempted to have these made myself for inexpensive sales at different art fair type events, but Heather's comment reassured me that I'm on the right path.
Here are the posts from the beginning on this project:
Cutting a substrate
Building a frame for the bottom of the substrate to prevent warping
Preparing the substrate with gesso and applying a background
1st layer of wax
2nd layer of wax
Scraping wax
 So yesterday and today I finished adding color and the last of the collage elements. The paper used is kitikata and I applied color with water colors and a waterproof sumi ink pen beforehand. You can barely see the paper in this pic--it's very delicate, like tissue paper.
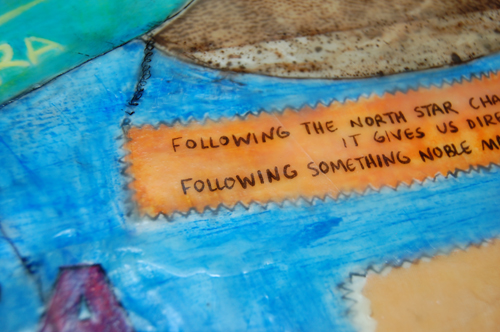 Then I just gently hit the paper with the heat gun and the paper just dissolved into the layer of wax below. You can't even see the paper.
 Burnish image face down with a wooden spoon. Then wet the back of the paper and gently rub the paper off. Fuse with heat gun and you're good to go.
Tonight I'll cut a frame for the piece which will finish the edges and provide a protective "lip." Process documented here. I'll put in hooks and a wire and hang the work in a prominent location, enjoying it for a day before it leaves for good.
Wednesday, December 15, 2010
Wax on, Wax off


 Oil stick on the crown area, which I'll wipe off with a paper towel which will leave the bits that stay in the incised lines.
Work as it stands right now.
Monday, December 13, 2010
2nd layer of wax

I was working away last night on the back porch so I needed to don my fleece bomber hat.
 I scratched, poked, and gouged into the wax, covered it with a good smear of oil stick, then wiped it off with a shop towel and the paint has stayed in the grooves. The area is then hit with a heat gun to fuse it to the wax. Tools used: scribe, roulette, wire brush.

When adding collage elements, I pre-warm the wax layer below with the heat gun, being careful to only warm it, not bring it to a liquid. Then I press the collage into the wax and the wax is usually tacky enough to hold it in place. Then I reheat with the heat gun and tap the paper with a skinny wooden dowel to push the paper firmly into the wax below, which is now nice and liquidy.
After the collage element is secure, I cover the entire piece with a layer of wax (not just the collaged areas) since I want this piece to have an even surface. Encaustic collage is wonderful because it really gives the illusion of depth even though the layers are only thinly separated by wax. I was too pooped last night to fuse the wax so that's waiting for me in my studio.
Friday, December 10, 2010
1st layer of wax, finally!
Stopped into Wally Workman Gallery the other day and saw some beautiful prints by Ellen Heck. If you get a chance, stop in to see her work. Very Cassatt. If you go by the gallery in person, ask to see some of Ellen's loose prints. They have some in a portfolio box and you can page through them.
Well, it's been a busy 24 hours. I didn't have much time for studio work yesterday unfortunately and it's not looking good for the rest of the day. I hope to really crank on the weekend. We have the usual bday parties, church, Camp Fire potluck, and open house, but I'm determined to carve out some time for myself. Luckily things die down both weekend evenings and I'll be able to lock myself in my studio.
Here's the project prior to applying a layer of encaustic medium

Next, brush on wax

Next hit with a heat gun.

Next step? Scrape some areas where the wax is too thick. When it gets to where I want it, I'll start putting on my collage papers, covering the entire thing with another layer of wax, and fusing the layers with the heat gun. Stay tuned!
Wednesday, December 8, 2010
Damar Resin and Heat Guns

I had a friend ask me about heat guns yesterday so I wanted to comment on what I've found to work. I have a Wagner Heat Gun HT1000 Dual Temperature, 750 and 1000 degrees F. This has worked just fine for fusing wax layers and adhering papers. I also have a quilting iron that I use on occasion if I'm having a problem with air bubbles under the paper. I read once that Jasper John used an iron, like a clothes iron, and I've heard folks use blow torches. Maybe the $100+ heat guns sold at art supply stores are totally worth it, I don't know. My $25 version has worked fine.
I have a graphic design job to work on this evening and it'll probably roll into tomorrow, so I may not be able to get back in the studio until tomorrow afternoon. But by then I'll have a ton of clean wax ready and waiting.
Tuesday, December 7, 2010
Making progress

Dry gesso, dry!!
I actually didn't have enough screws for the frame and needed to run to the hardware store to pick up some more. My husband suggested I put the too-long screws in a vice and grind them down. Yes, maybe if I didn't have access a car and need 20 of them, and if the cost was going to be $50 vs. $1. I'll kill the 20 mins round trip, thank you, and drive myself to the store.

No wax has been applied to this work yet, but hopefully tomorrow. After spending two hours heating up my wax supply, I noticed little bits of funk in it from an old brush, so now I need to cool it in tins and scrape the funk off that settles (like when I make encaustic medium). Then reheat and try again.
Monday, December 6, 2010
Finishing Encaustic Substrate
My shoulder is feeling so much better. My 60-min professional massage yesterday made a huge difference and I was able to use the chop saw without an issue. Yay! So, after having the 1/2" plywood cut and sanded to size (18 x 22"), I cut a frame for my plywood, as well as a center bracket for additional support.

I used 1 x 2 1/2" wood for beefier support since it's a larger substrate, instead of 1/4" round as seen here. I puttied up a few blemishes in the plywood and it's some crazy waterproof epoxy that takes 24 hours to cure (overkill, but I had it on hand), so once it's dry I can glue and screw my frame to the back of the plywood. After that I'll sand the wood putty and gesso the front of the plywood twice with sanding in between. (It's a bummer that I need to wait until tomorrow on the gesso due to the crazy overkill putty. You can apply it underwater, so you can imagine how viscous and sticky it is.)
I wheeled the chop saw out to the driveway because it's a beautiful day and I could then skip vacuuming. I had a ton of stares by the neighbors and road crew working around the corner. I'm not sure if they were appalled or impressed.
Sunday, December 5, 2010
Building a substrate for an encaustic piece
I am creating an encaustic piece based on this print. It started as a request from a collector, and as I've been thinking about the steps I'll need to take to create it, I've been getting more and more excited about the process.
My shoulder is on the blink. My left "wing." I've avoided all meals in cast iron pans for the last couple of days and it seems to be improving. As a result my husband needed to use the power tools for me today to launch this project on time. I have to say it was nice to have my own carpenter cut and sand my plywood to spec, even though this is how I'm feeling.

 Look, no need for a table saw. Here Keith is using a circular saw with a ruler clamped in place as his guide to cut my 1/2" piece of plywood. (You can't see his earplugs, but he's wearing them. We're safety nerds around here.)
Keith's chosen the smoothest side to sand and smooth for my work surface. He's even used three different kinds of grit. (Hmm. I'm thinking being an injured bird isn't so bad.)
Tomorrow's task: Cut a support frame and glue and screw to the substrate.
Thursday, December 2, 2010
Framing an Encaustic Piece
Substrate movement can cause the wax on your encaustic piece to chip or crack so you want a stable surface, impervious to warping. I use gessoed board as my substrate, such as Rembrandt, but to keep the board from possibility warping while also protecting the edges of the work, I bring out this bad boy:

The frame can be made with a miter box and a handsaw, so no need to fret if you don't own a chop saw. I know this because up until a year ago that's what I was using.
 Step 1: Photograph work. The frame looks nice and can add to the piece, but it also adds a mini shadow. At least taking a picture beforehand gives you the option of using either. One suggestion when photographing encaustic work is to use a diffuser. I'll post about a handmade version in a few days. This picture wasn't taken with a diffuser and you can see a glare on the wax.

Step 2: I cut 1/4 rounds to outline the back of the substrate which will help stabilize it. I suggest using more substantial wood for your support as well as use wood screws in addition to glue, if your substrate is 12x12 or larger. Of course pre-drill for the wood screws. For additional warping support on large pieces, use corner braces.
As for glue, I like WeldBond because it rocks for all kinds of projects. It's not easy to find locally and my husband has resorted to ordering years worth online somewhere. Probably not Amazon, but I've provided a link nonetheless. Go local if you can!
 Step 3: For additional edge support, cut thin pieces of wood for a frame, producing a lip. Screw or nail in as well as glue.
 I use these adorable little tack nails which aren't the best, but they aren't intrusive looking and besides, I have the glue doing the heavy lifting.
Step 4: Screw eyelet screws into the back of your substrate--I put them close to the side 1/4 rounds about a 1/3 of the way down from the top--being careful when you pre-drill the hole not to go through to the other side. Yes, I've done this. Nothing wax and a heat gun can't solve, but a pain nonetheless. Now add wire and you're ready to hang!

The frame can be made with a miter box and a handsaw, so no need to fret if you don't own a chop saw. I know this because up until a year ago that's what I was using.


Step 2: I cut 1/4 rounds to outline the back of the substrate which will help stabilize it. I suggest using more substantial wood for your support as well as use wood screws in addition to glue, if your substrate is 12x12 or larger. Of course pre-drill for the wood screws. For additional warping support on large pieces, use corner braces.
As for glue, I like WeldBond because it rocks for all kinds of projects. It's not easy to find locally and my husband has resorted to ordering years worth online somewhere. Probably not Amazon, but I've provided a link nonetheless. Go local if you can!


Step 4: Screw eyelet screws into the back of your substrate--I put them close to the side 1/4 rounds about a 1/3 of the way down from the top--being careful when you pre-drill the hole not to go through to the other side. Yes, I've done this. Nothing wax and a heat gun can't solve, but a pain nonetheless. Now add wire and you're ready to hang!
Saturday, November 27, 2010
Artmakers Collective in Bastrop

This past Tuesday I dropped 7 pieces off to the Artmakers Collective in Bastrop. Lots of nice work can be found in there, from 2D to 3D to jewelry. I especially enjoyed the works made by Stephanie Strange with a typewriter. I was fortunate to have friend and fellow artist Carolyn Kimball along for the ride, and we stopped into the cutest little place for lunch called Green Chai Cafe. The place was popular--lots of visitors during lunch. The chef obviously takes care making the food as there was a wait but we spent the time chatting and the food ended up being oh so delicious.
The last several weeks have been a blur. I'm looking forward to a mostly quiet December and getting in and printing.
Sunday, November 21, 2010
Grant Wood
Good news, I finished up the book on my sewing machine table nightstand, so I was able to crack my new Grant Wood biography this afternoon (previous post here). On the first page they have one of my favorite words--doppelganger--so I'm looking at that as a sign of good things to come.
 I worked on some encaustic pieces this afternoon. They are in a state of flux, which is bad news for the next couple of days because I'll be in a flurry, but yet they're started, so it's not all bad. This one here was started a year ago but set aside and nearly forgotten. The black spiral is a black hole, which was how I was feeling at the time. I've updated it with a head, but we'll see where it leads. It could be completely different come Tuesday. One great thing about encaustic is you can heat any element and remove it, either by softening the wax and peeling it up or by scraping it off. So there are no mistakes.
I had someone ask me about an encaustic workshop today and I'm contemplating holding one. It would be after the holidays, but the weather would need to be reasonable since we'd need to work outdoors. I usually work on my back porch due to the fumes even though I wear a respirator, but with several of us we'd need to be completely al fresco due to space. Anyone possibly interested? I would be able to talk about traditional encaustic, but the workshop would be on encaustic collage--taking papers you currently have and adding to them with paints, watercolors, etc, and then collaging them to a matrix with wax medium. Let me know if this sounds interesting to you. I'm still working out the supply list as well as the cost, but knowing who might be interested would get the ball rolling. I'm be doing some research in the meantime.

I had someone ask me about an encaustic workshop today and I'm contemplating holding one. It would be after the holidays, but the weather would need to be reasonable since we'd need to work outdoors. I usually work on my back porch due to the fumes even though I wear a respirator, but with several of us we'd need to be completely al fresco due to space. Anyone possibly interested? I would be able to talk about traditional encaustic, but the workshop would be on encaustic collage--taking papers you currently have and adding to them with paints, watercolors, etc, and then collaging them to a matrix with wax medium. Let me know if this sounds interesting to you. I'm still working out the supply list as well as the cost, but knowing who might be interested would get the ball rolling. I'm be doing some research in the meantime.
Thursday, November 18, 2010
Day 4 in studio--encaustic work
Depending on how much encaustic medium I have in my crock pot, it takes more or less 2 hours to melt on low. So while that was going on, I did much much needed household chores including cleaning my studio. Here's a before picture.
 You can tell it's been a week since I've worked in here. (I tend to retrieve what I need then put it back in the studio but not in it's proper place because I always seem to be in a hurry, which in a nutshell, is what I've been doing all my life with all my stuff. But luckily I eventually get around to tidying.) Here's after. I made sure to photograph the shoe caddy which I've turned into a misc. caddy.


First on my agenda is finishing the piece I started a week or so ago--I'm about 1/2 way through. I also want to start two new pieces, continuing with the head theme (after all, I have a ton of solar plate heads). I hope to drop off work to a little gallery in Bastrop called Artmakers Collective early next week, so I need to get crackin.' I also wanted to note my favorite encaustic books for those wanting to explore this medium. Encaustic Workshop and The Art of Encaustic Painting, are available through Amazon, but I'm sure worth pursuing through your local bookstore.


First on my agenda is finishing the piece I started a week or so ago--I'm about 1/2 way through. I also want to start two new pieces, continuing with the head theme (after all, I have a ton of solar plate heads). I hope to drop off work to a little gallery in Bastrop called Artmakers Collective early next week, so I need to get crackin.' I also wanted to note my favorite encaustic books for those wanting to explore this medium. Encaustic Workshop and The Art of Encaustic Painting, are available through Amazon, but I'm sure worth pursuing through your local bookstore.
Tuesday, November 9, 2010
New encaustic

I'm working on this piece today--I have my encaustic medium melting away in my crock pot right now. The bottom papers already have a layer of wax on them so I need to fuse them with my heat gun, then start layering on the cut prints, adding more wax and then fusing again. The head is also one of my prints, but it's a reproduction of a early phrenology map. I have a ton of heads from my drypoint project and I intend to use them up!
Thursday, October 28, 2010
What the heck is encaustic?
 I've had several people ask me this. A simple answer is the artwork contains wax as a material, typically mixed with pigment. Jasper Johns made encaustic famous with his target paintings, flags, the number 5, and his maps, but it's been around since the Egyptians were using it in mummy portraits in 100-300 A.D. I use wax to make collages and don't mix pigment with my beeswax/damar resin concoction but basically use it as an adhesive (resin makes the beeswax a little harder, a little more durable).
Here's one of my encautic collages here.

There are all kinds of techniques in working with wax that I won't go into here, but in a nutshell it involves a heat gun or an iron to fuse the layer of wax to the layer below. Some encaustic artists use 100% beeswax, some have come up with their own special formula of wax to resin. I use 10:1, beeswax:resin. I heat the wax resin mixture in my special wax melting equipment--crockpot from the Goodwill--on low. I move my operation onto the back porch where it's well ventilated.


Encaustic medium is for sale for those that don't want to bother melting and combining wax with resin. What's the fun in that? I personally am process kinda girl!
Subscribe to:
Comments (Atom)